This guide is intended for use with the Maintenance Box T6710 / T6711 Chip Resetter
The process describes how to reset the chip on compatible products including the following maintenance box units:
- T6710
- T6711
- E6710
- E6711
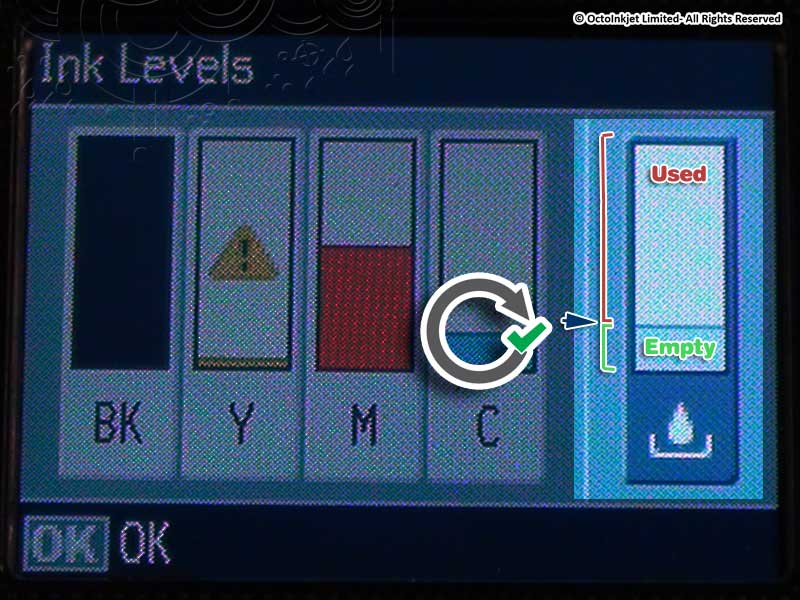 |
IMPORTANT: The chip resetter will only reset chips if they have not reached 85% full/used. Tip: Make sure you check the maintenance box level (see image left) on a regular basis and reset when appropriate. |
|
1. Turn the printer off and remove the maintenance box using the instructions provided. Tip: This usually involves removing the rear paper feed cover and then pulling the maintenance box out.
| |
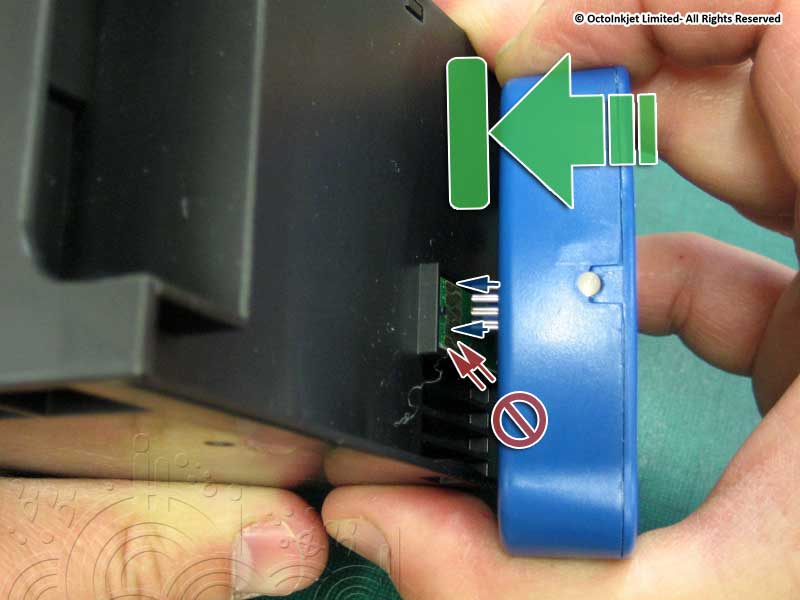 |
2. Locate the chip, then align the resetter pins with the correct contacts on the chip (see following images) |
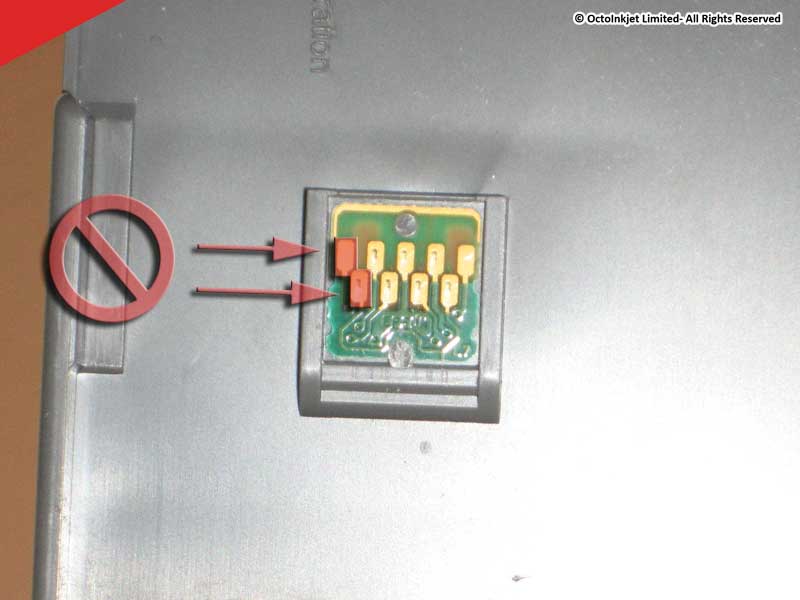 |
2a. OEM chip shown. The correct pins to apply the resetter to are shown to the right of the chip. The two contact indicated in red should be left without contact. |
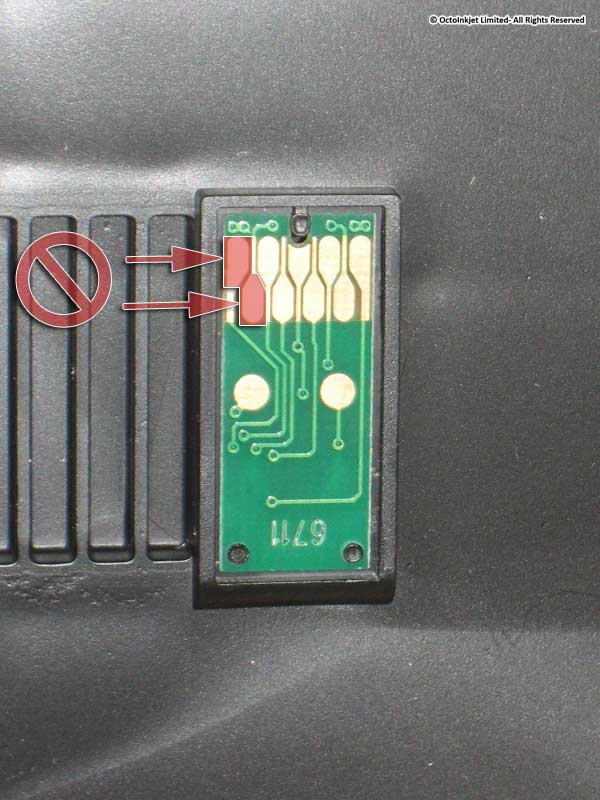 |
2b. Compatible chip shown. The correct pins to apply the resetter to are shown to the right of the chip. The two contact indicated in red should be left without contact. |
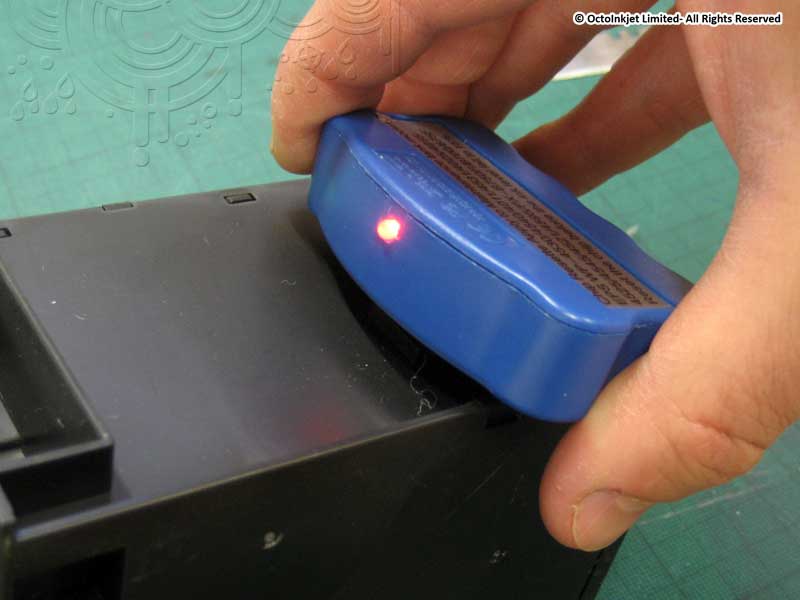 |
3. The LED will flash red initially while it tries to connect to the chip. Tip: It will do this regardless of whether the pins are in the correct position or not. |
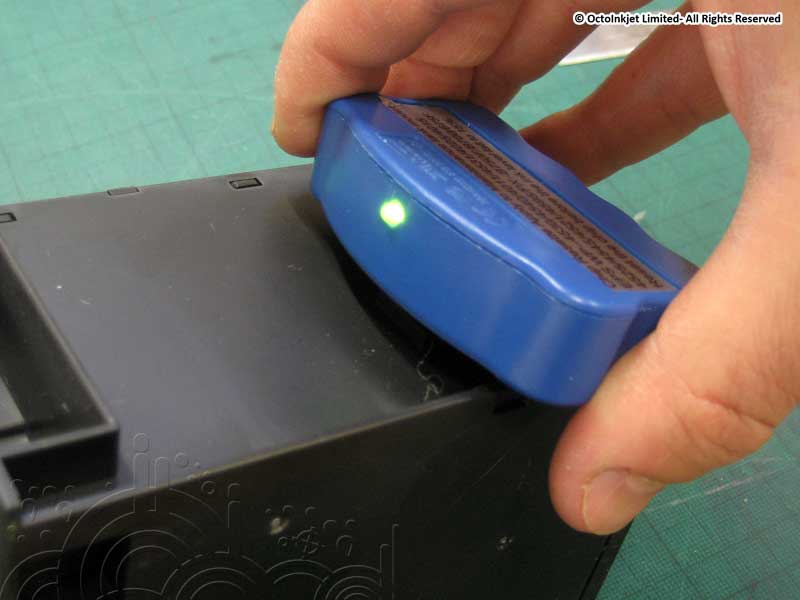 |
4. If the chip has been reset successfully the LED will show a green light. If not, try re-aligning the pins on the chip and try again. |
Troubleshooting
If your chip has passed 85% full (and does not appear to reset) or the chip is no longer being recognised, the following may apply:
- Try gently cleaning the chip using a dry cloth to remove any dirt, grease or other substance from the chip contacts.
- Compatible Chips/Box:
– Carefully remove the chip from the maintenance box and check the back of the chip.
– If it has a battery use instruction steps 6 – 9 in this guide to replace the battery on the chip. Then replace and re-try in the printer.
- Replace the chip on the maintenance box or the whole maintenance box (including chip).
